
Skill share: How to use the ‘doodle method’ for transferring your mural design
The "doodle grid" (also called the "scribble grid" or "squiggle grid") is a popular alternative to a traditional measured grid or projector for transferring a digital mural design onto a wall. Instead of precise measurements, you cover the wall with random doodles that act as reference points, then use an app like Photoshop or Procreate to overlay your design and match it to those doodles. It’s a great method for transferring a super large, outdoor design to a wall! Here’s how it works...

Digital rendering of mural design - these days, I create all of my mural designs in procreate. This design was created to showcase the spirit of Hyattsville, MD, and includes plants, animals, and other signature landmarks of the town.
Step 1: Prep the wall
Determine the scale and dimensions of your area, and mark out the boundaries of your mural using tape or another marking tool.
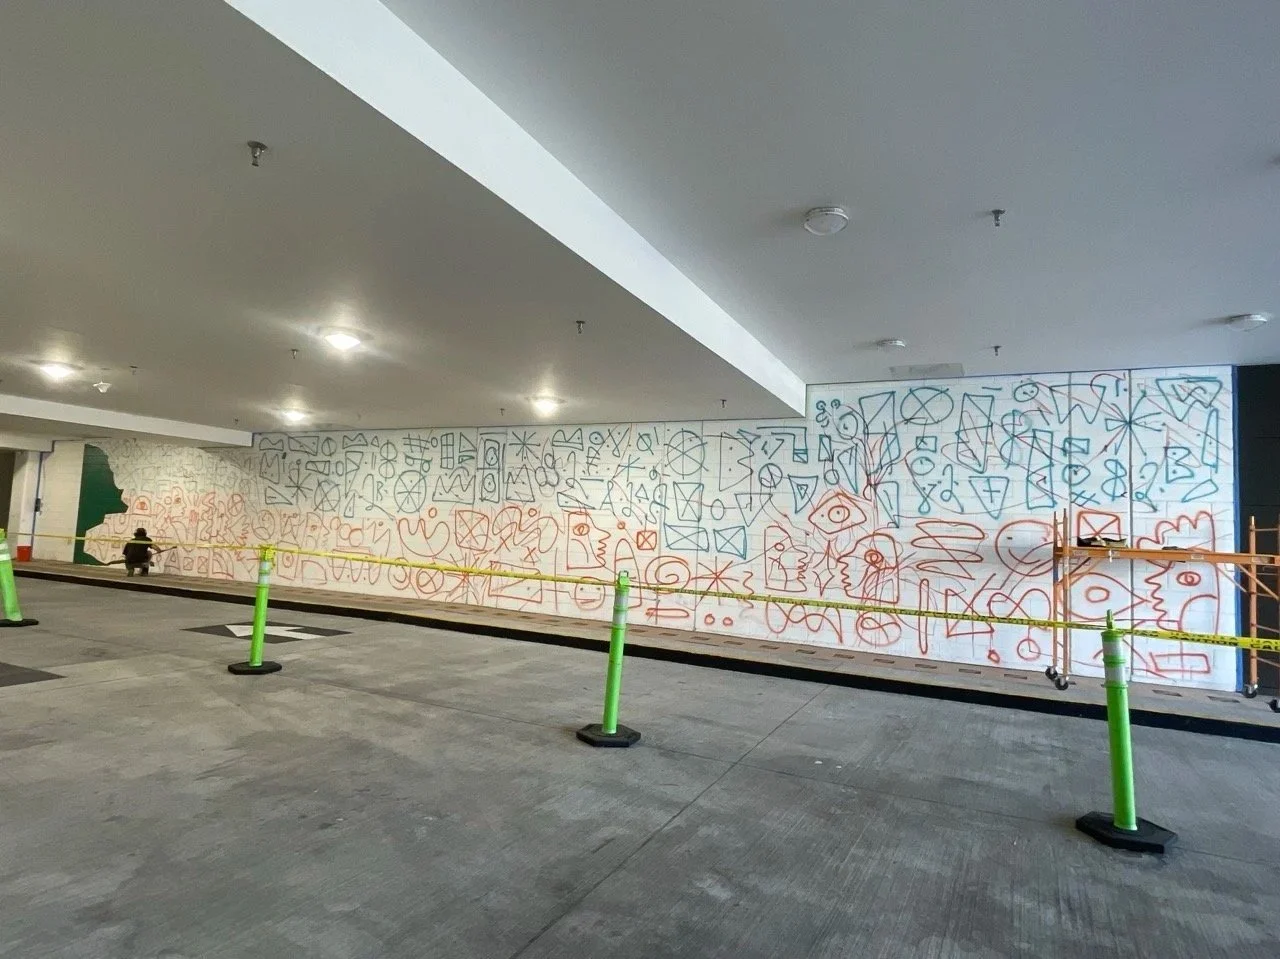
Step 2: Cover the wall in random doodles!
Fill the wall with random doodles - I like to fill mine with squiggles, faces, hearts, stars - but you can put anything you like! There's no need for precision here; the goal is just to create a dense, irregular field of marks you can reference later. I usually do it with spray paint (be sure to wear a mask to protect yourself from the fumes!)
Step 4: Import into design software
Bring the photo into an app like Procreate or Photoshop.
Step 5: Overlay your design
Import your mural design and overlay it on top of the photo, adjusting it to fit the wall layout. Then decrease the opacity of the design layer until you can see the doodles underneath.
I recommend printing out a few copies of this overlay, especially if multiple people are working on the mural.
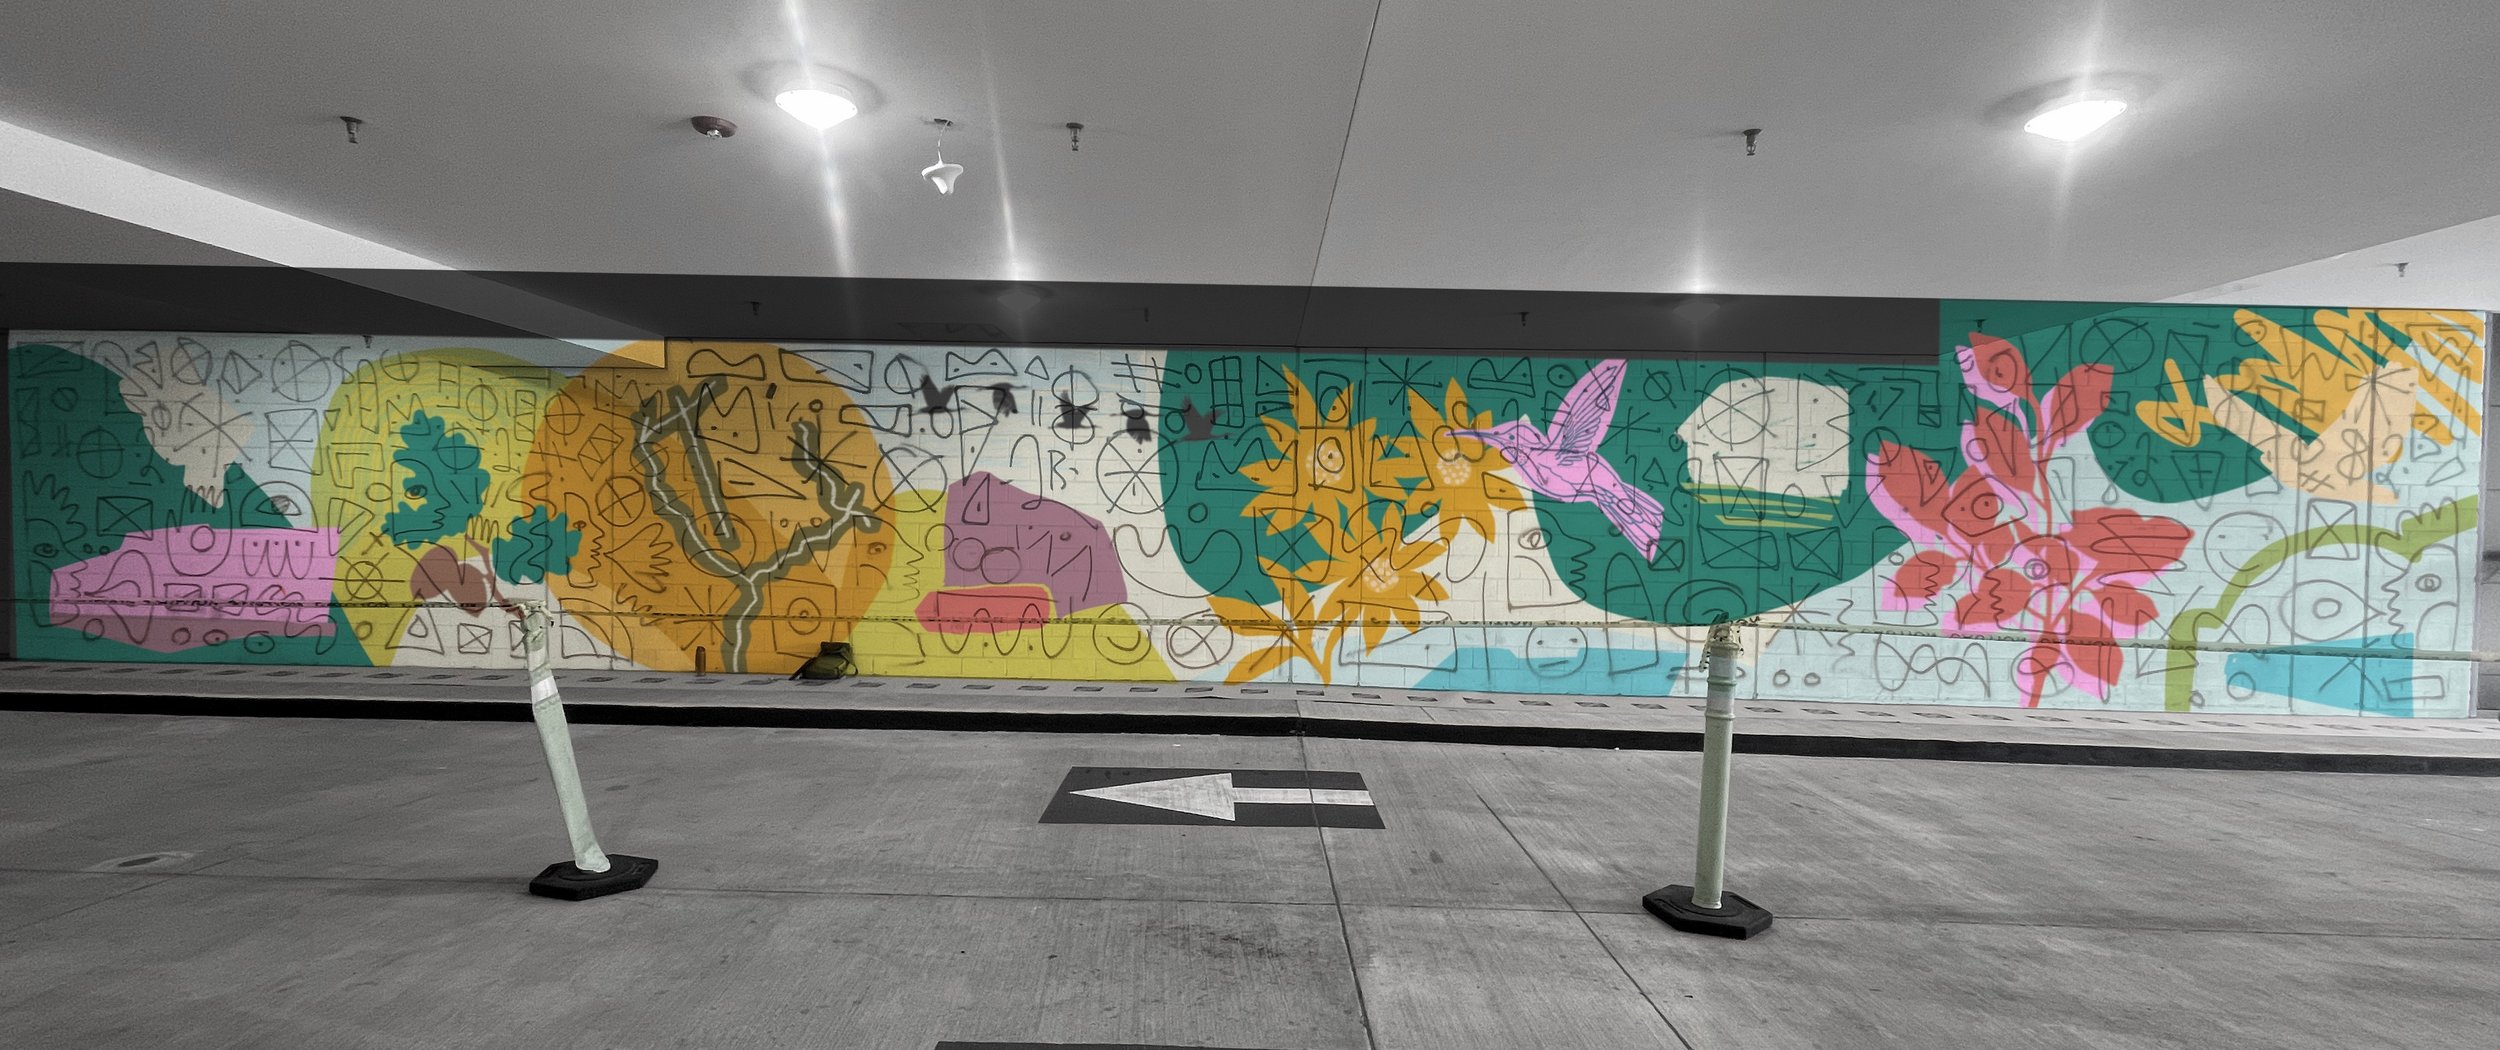
Overlay of digital design over photo of wall with doodle grid. I reduced the opacity to about 50% on the file of the design.
Step 6: Map intersection points
Look at where your design's lines intersect each doodle shape, and use those intersection points as your guide. Essentially, each squiggle becomes a landmark that tells you exactly where a line of your design should land on the real wall. It works just like the “traditional” grid method - but way easier to get on the wall.
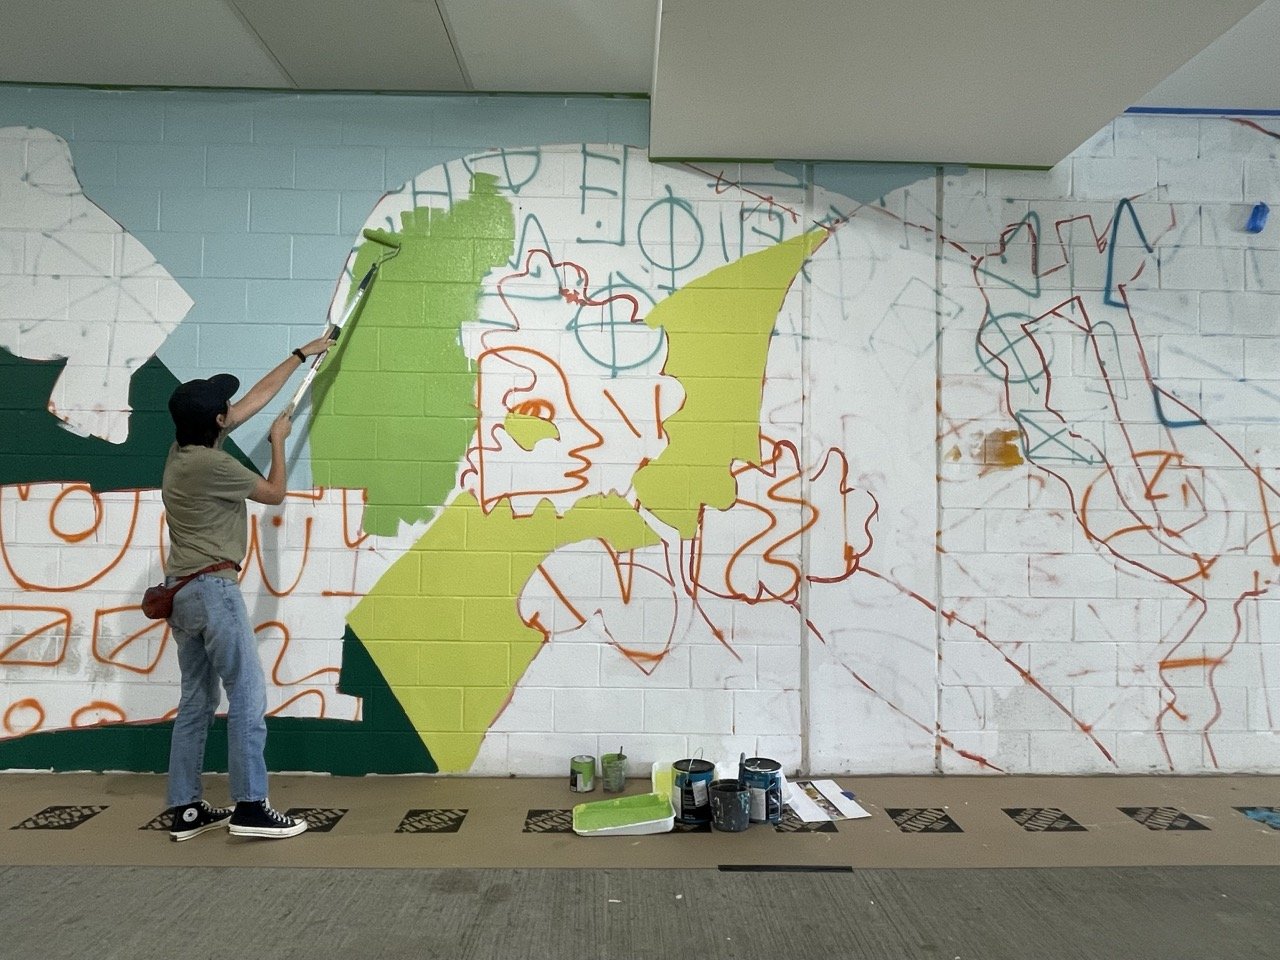
Step 7: Transfer the design to the wall
Using the doodles as reference points, sketch your design onto the wall, checking your digital mock-up frequently and stepping back often to make sure everything lines up.
It can be helpful to roughly paint the composition with a neutral base tone first. This helps to visualize the whole image before more detail is added.
Step 9: Paint the outline and details
Once your sketch is transferred, begin filling in your design. That’s it!
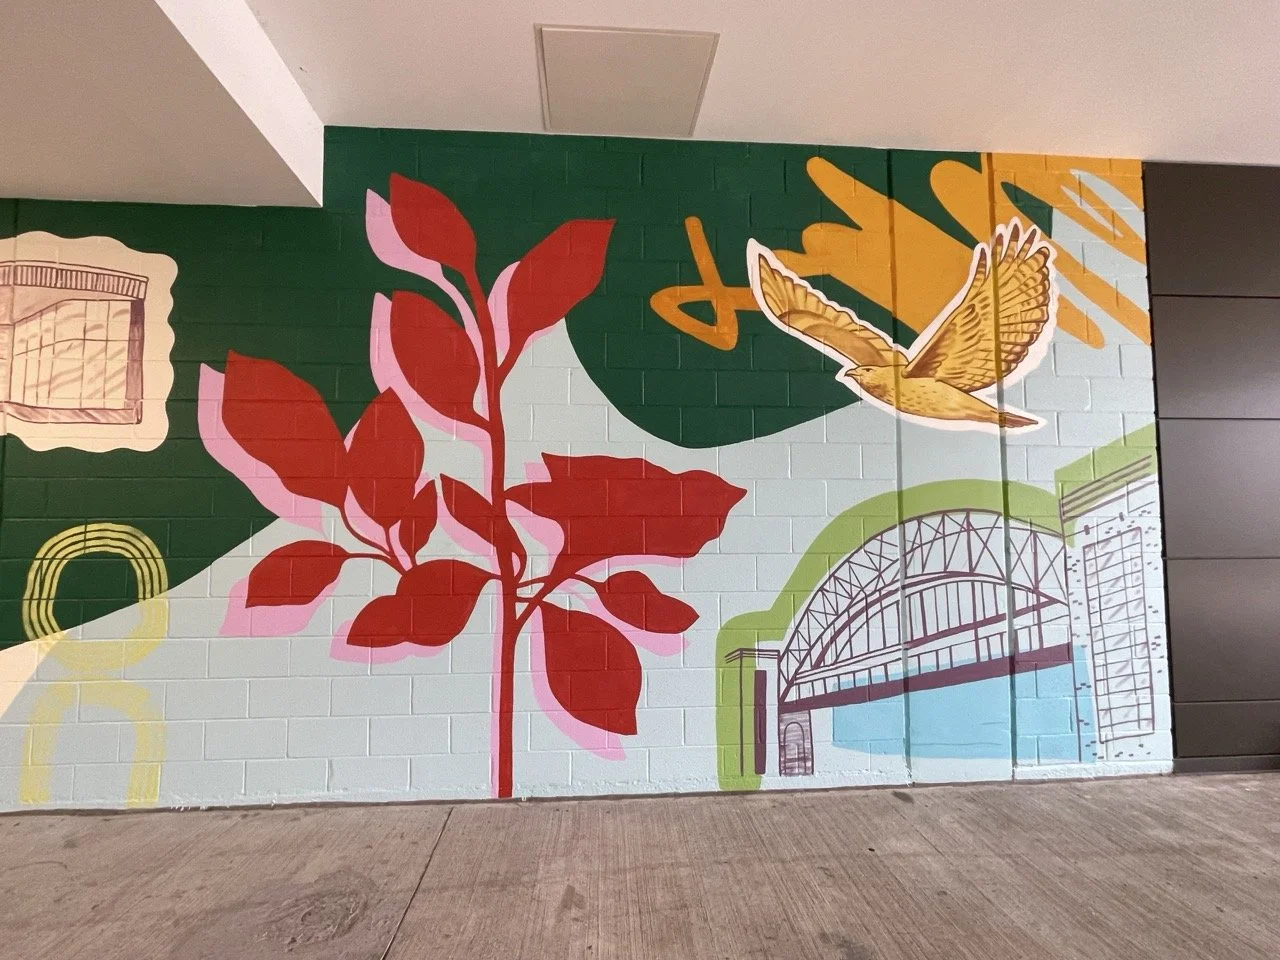
Section of completed mural
